
After a recent WooCommerce update, some users are noticing that brand URLs — like yoursite.com/brand/your-brand-name — are no longer working. This typically happens because WooCommerce has introduced “Brands” as a built-in taxonomy, which behaves more like categories and tags than a regular product attribute.
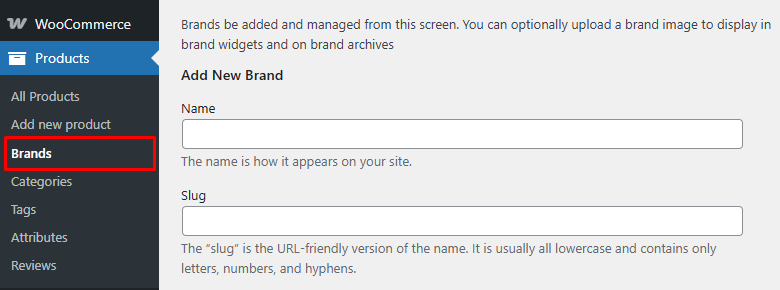
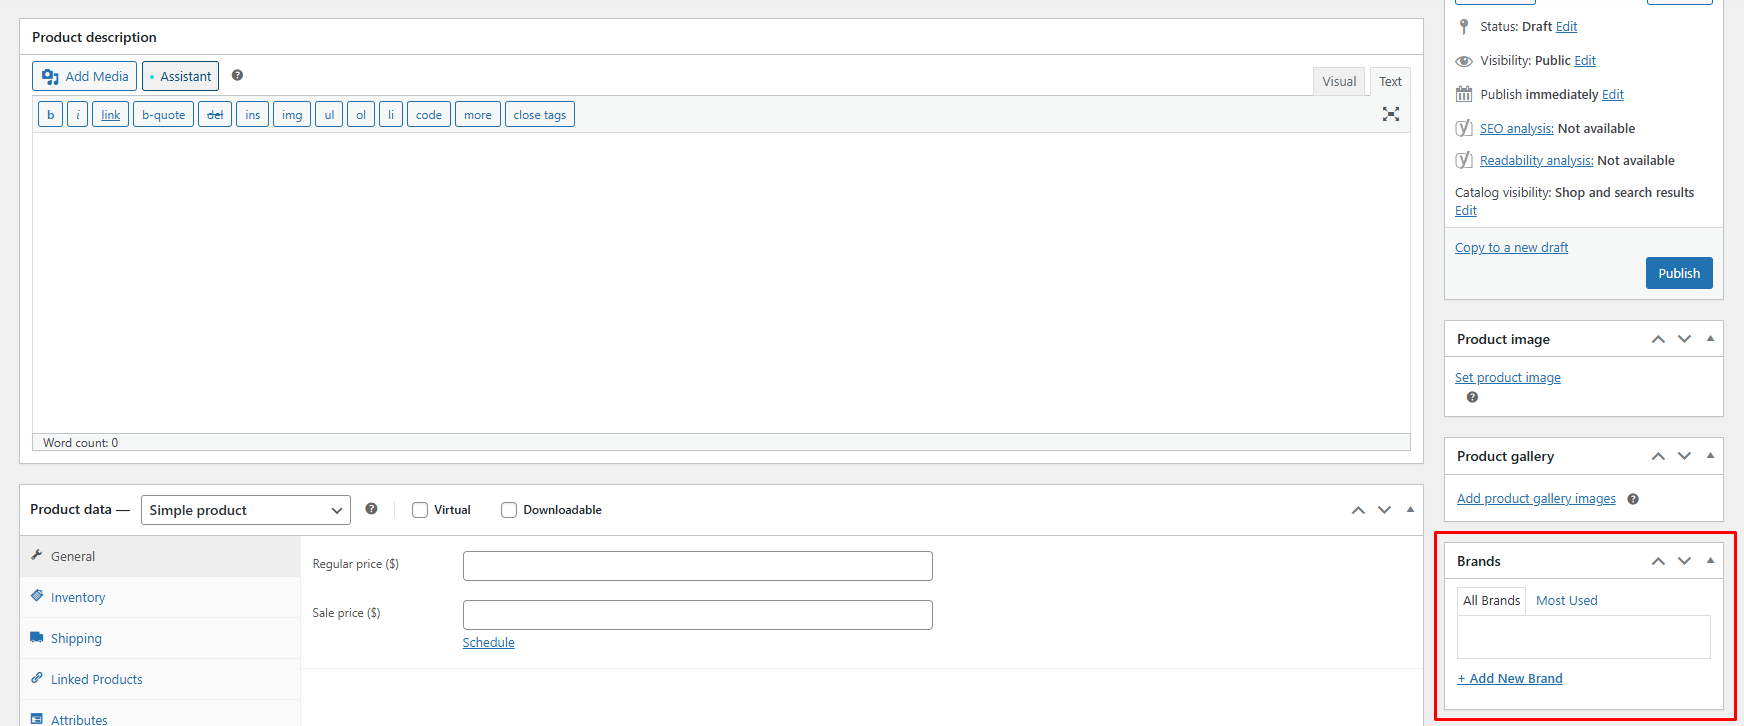
Previously, many store owners used a custom attribute called “Brand.” But with the new system, you’ll now find Brands under Products → Brands, and they’re managed separately when editing products.
Why This Causes Problems
If your theme or plugins were built around the older attribute-style brand system, the switch to taxonomy-based Brands may cause URL conflicts or broken links. WooCommerce will likely patch this in future updates, but if you’re experiencing issues now, here are two ways to fix it.
This shift in how brand data is handled can cause conflicts with older permalink structures, especially if your theme or plugins rely on the previous setup. While the WooCommerce team often addresses these bugs quickly, you might need to revert to a previous version if your site can’t wait.
Option 1
Disable Built-In Brand Support with a Code Snippet
Instead of rolling WooCommerce back, you can disable the new Brands feature entirely using a simple code snippet. This method is lightweight and ideal if you don’t want to downgrade your plugin.
Add this code to your theme’s functions.php file or a custom plugin:
add_action( 'init', function() {
    update_option( 'wc_feature_woocommerce_brands_enabled', 'no' );
} );
Option 2
Step 1: Back Up Your Entire WordPress Website
It’s never safe to start messing with versions (or any major changes) without a good backup. Make sure you have a full backup that includes both your WordPress files and your database. You can use:
- Your hosting provider’s backup feature
- WordPress backup plugins like UpdraftPlus, Duplicator, or BackupBuddy
Once your backup is safely stored, you’re good to move on.
Step 2: Install a Rollback Plugin
WordPress has a handy plugin called WP Rollback that makes downgrading themes and plugins easy:
- Log into your WordPress dashboard.
- Go to Plugins > Add New.
- Search for “WP Rollback”.
- Click Install Now, then Activate.

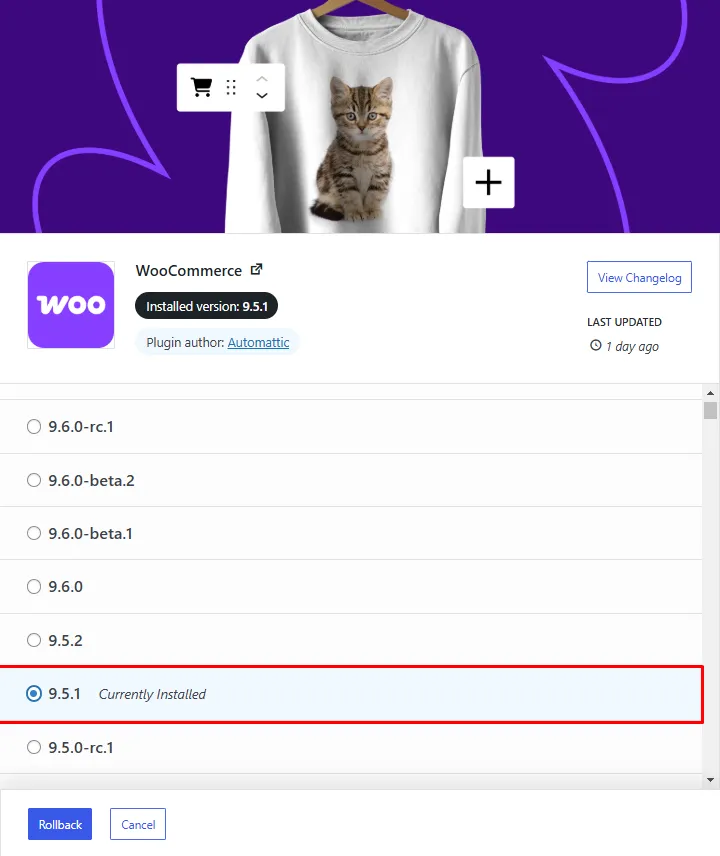
Step 3: Roll Back WooCommerce
Now that the rollback plugin is active, downgrading WooCommerce is straightforward:
- Head to Plugins > Installed Plugins.
- Find WooCommerce and click the Rollback link.
- Choose WooCommerce 9.5.1 or an earlier version.
- Confirm your choice and wait for the process to finish.
Step 4: Test Your Site
After rolling WooCommerce back, test your brand URLs to confirm everything is working again:
- Clear any caching plugins (if you use them) and clear your browser cache.
- Open a private/incognito window to ensure you’re seeing the latest version of your site.
- Visit a few brand URLs (like yoursite.com/brand/yourbrand) and make sure they’re loading correctly.
Step 5: Stay on Top of Updates
While rolling back is a quick fix, you don’t want to stick with an old WooCommerce version forever. Watch for updates or patch notes that mention a fix for brand permalink issues. Once you see that the bug has been addressed:
- Update WooCommerce on a staging site (or use your backup) first, just to test it out.
- If everything works, you can safely update your live WordPress site.
Quick Recap
- Always Backup First: Never skip this step, especially if your WooCommerce store handles customer data.
- Use WP Rollback: It’s the easiest way to downgrade plugins in WordPress.
- Choose 9.5.1 or Below: These versions typically don’t have the brand URL bug.
- Test and Clear Cache: Make sure your brand URLs work again.
- Monitor Future Updates: Look for official fixes and upgrade when you’re ready.
That’s it! Rolling back WooCommerce is one of the fastest ways to fix those broken /brand/ URLs on your WordPress site. Give it a try, and let your customers keep browsing your products without interruption. Good luck!